Video Synchronization
The first step, when creating a lecture video with Blender.LectureEdit is to synchronize the source files. This compensates the offsets between videos, whose recording has been started at different points in time. It also takes into account, when the frame rates of those videos are not exactly identical.
Conversion of frame rate and resolution
Note
By default, Blender.LectureEdit assumes, that the source videos are recorded with 25fps and a resolution of 1920x1080. The target video will have the same parameters. If you prefer different settings, you have to adjust the default settings.
Sometimes, the source files have not been recorded with an identical frame rate and resolution. For example, in the CYSTINET-Africa project, all speaker videos have been recorded with a camera at 1920x1080 pixes and 25fps, while the slides were recorded with a screen capture, that has the 60fps frame rate and 3360x2100 resolution of the monitor. In such situations, it is necessary to convert the videos with an external tool.
You can use ffmpeg for this purpose.
The following command converts the video with the file name original.mp4 to a video with 25fps, 1920x1080 resolution and the file name converted.mp4
ffmpeg -i original.mp4 -vf scale=1920x1080,fps=25 converted.mp4
If you have installed ffmpeg to /usr/local/bin (like it is being done by Homebrew on MacOS), you can use Blender.LectureEdit to invoke ffmpeg for converting the slides video(s).
For this, make sure, that the source videos are in the Raw directory and are named like the respective files in the Source directory would be.
Then, you can issue the following command in the Python console.
>>> automation.convert_slides_videos()
Setting up the scene
The following command sets up the project as far as it can.
>>> automation.setup()
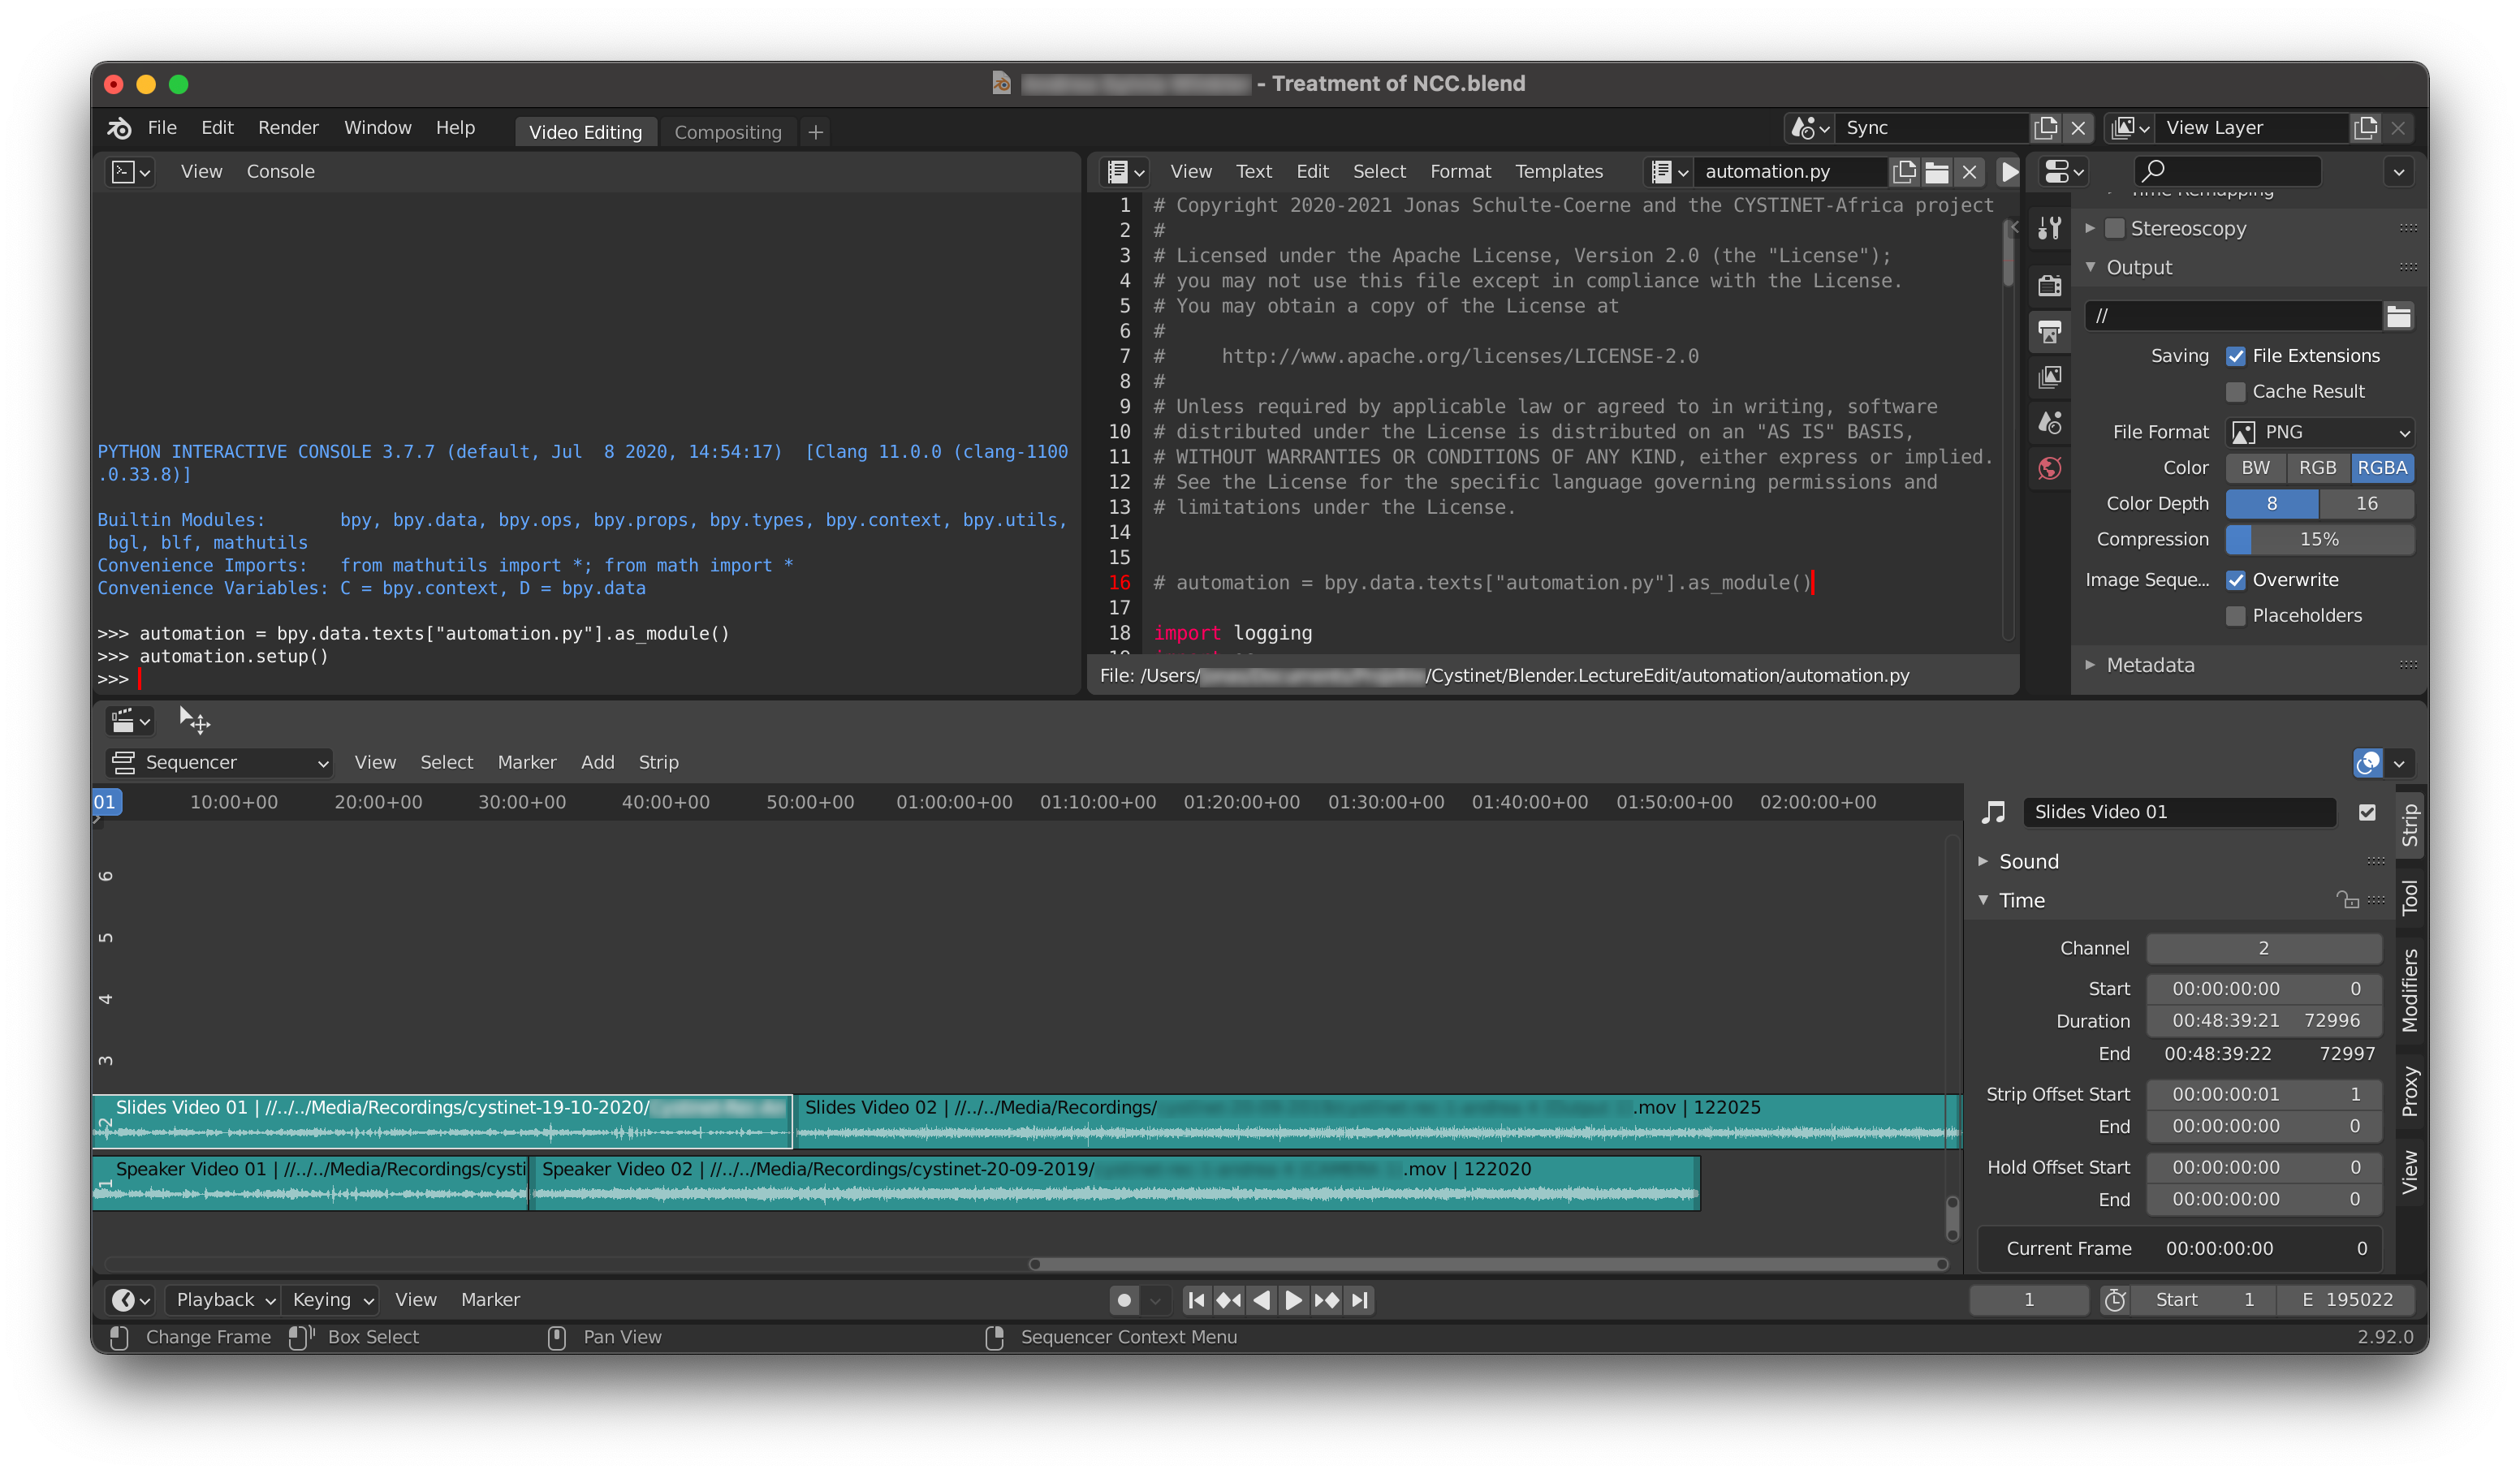
Since the synchronization is the very first step, this command does not get very far, but at least, it loads the audio tracks of the source files into the Sync scene. So, now you can navigate to the Sync scene and use Blender’s sequencer to align those files.
Here is a screenshot, how this might look like:
Synchronizing the files
The reference for the synchronization is the audio track for the speaker. Usually, this is the audio track of the speaker’s video, however, if a separate audio file is provided, this is taken as the reference. The reference is loaded in the first track of the sequencer. It is not necessary to edit anything about this track. It is even discouraged to do any cropping to the relevant bits of the recording, because this is being done in the subsequent step.
Now, the other tracks have to be aligned to be in sync with the reference. So, start at the beginning of the track and move it, so that its audio coincides with the audio of the reference. Here are some hints on how to do that:
Listen to the track and the reference individually, so you get an idea of how much offset there is between the two. You can select a track and press
hto mute the track. Unmuting is being done withAlt + h.Move the track around with the mouse, so you have a coarse adjustment of the track with respect to the reference. If you now listen to both tracks simultaneously, it should sound like an echo or a reverb. You can use the mouse wheel to zoom in on the audio tracks and do a fine adjustment by comparing the visualization of the audio track’s wave forms.
The final fine adjustment should be done by shifting the audio track frame-by-frame. You can do this by selecting the track and then adjust the strip settings on the right of the sequencer. The setting, you want to adjust is called Start and can be found under Time (which is open by default). The fine adjustment can be done by looking at the wave forms or by ear. When experimenting with moving around the audio track with respect to the reference, you will notice, that …
… large offsets sound like the chaotic playback of two unrelated audio files.
… moderate offsets sound like there is an echo.
… small offsets sound like there is some reverberation.
… tiny offsets sound a little bit metallic and not natural (this is due to a comb filter effect).
… if there is no offset, the speaker sounds natural and often marginaly louder.
After aligning the beginning of an audio track with the reference, you should do the same with its end. This way, Blender.LectureEdit knows, if there is any drift between the two recordings.
With this, you cut the audio track in half by positioning the blue position marker somewhere in its middle and press k.
After that, you crop the parts of the audio track, so they only cover its beginning and its end.
This way, you have some wiggle room to align the part at the end of the track.
You repeat the aforementioned alignment procedure for the part at the end. Since this only compensates the drift, this part should already be well aligned, so that you can start with the fine tuning immediately.
Repeat this for all of the files, that need synchronization.
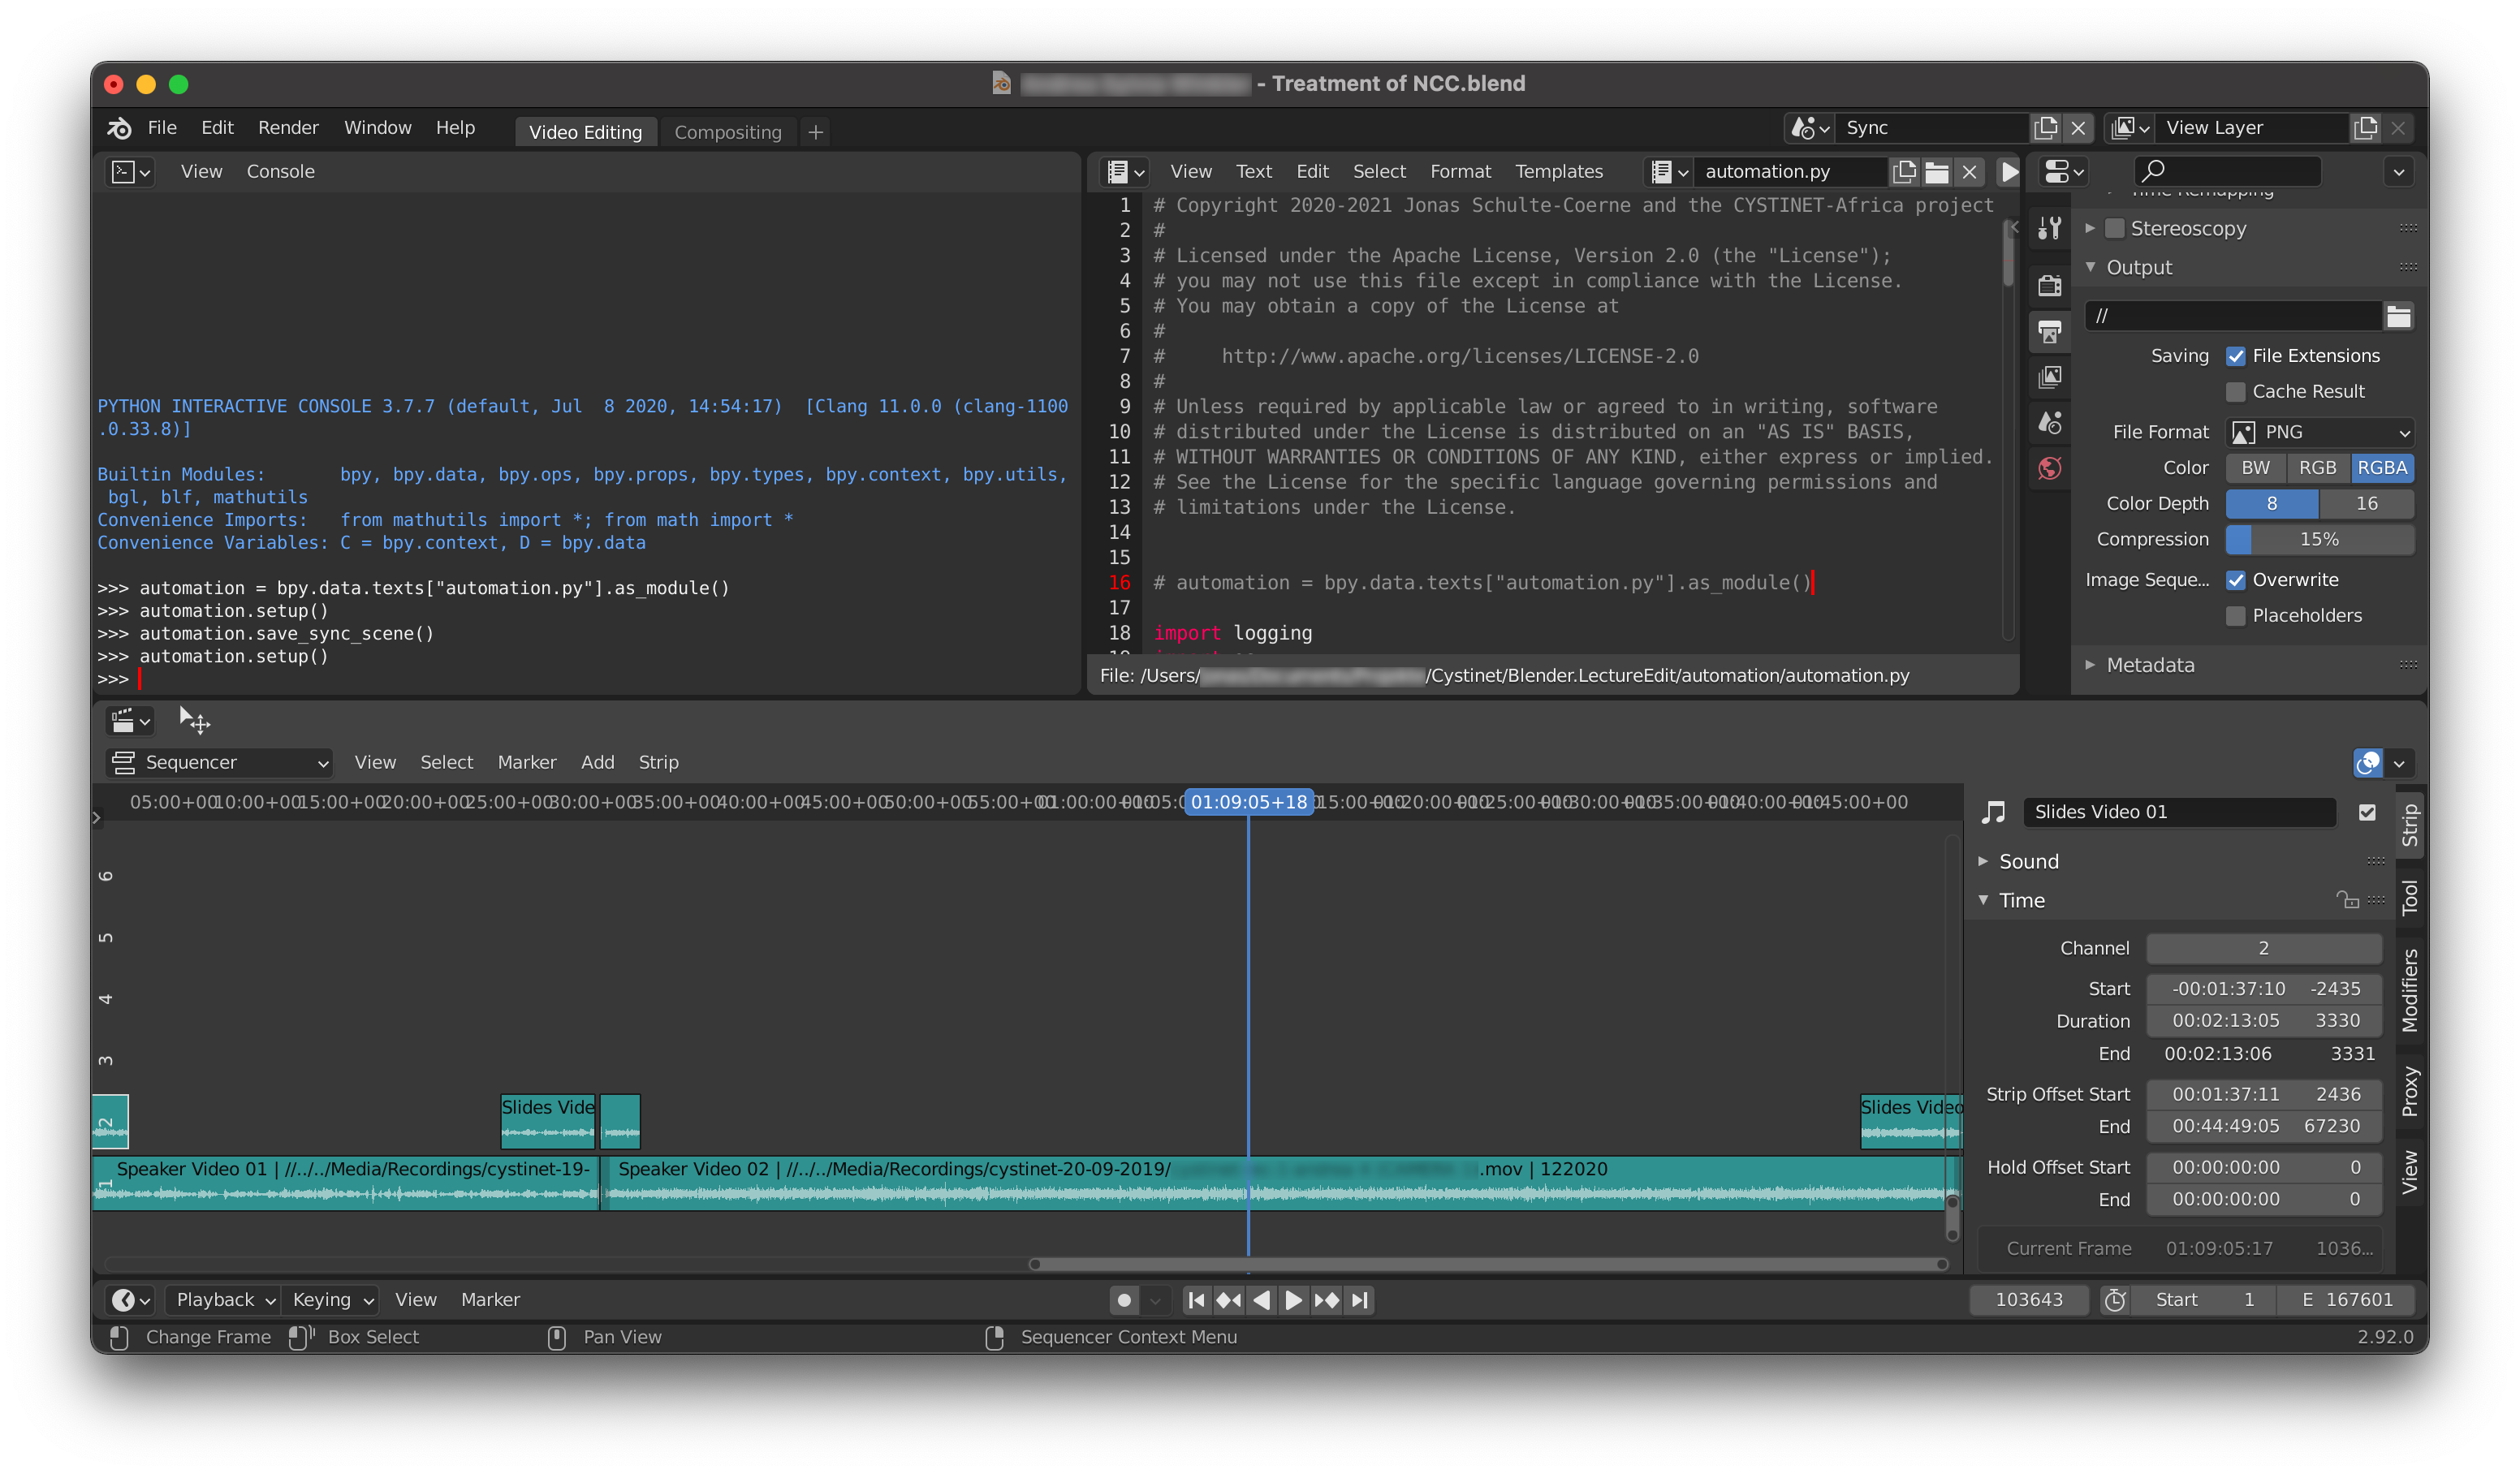
The following screenshot shows an example of how the sequencer looks like after the syncrhonization of a slides video with a speaker video, both of which were split to two files each.
Saving the results
Finally, you have to save your results, so they can be used in subsequent processing steps. This is being done by issuing the following command in the Python console:
>>> automation.save_sync_scene()
You might notice, that this created a json-file in the Intermediate directory.
This file contains all information about the synchronization of the source files for this lecture.
It is loaded, whenever the offset between those files is relevant.
And it can also be used to restore the configuration of the tracks in the Sync scene.
So if you happen to delete the scene or the Blender project file altogether, you can simply issue the command automation.setup() to get back to the last saved configuration.