Setup
In this section, you will learn how to set up a project for the post-production of a lecture video with the help of Blender.LectureEdit.
Prerequisites
For this project, you need the following:
You have to have Blender installed on your computer. You will find the instructions for that on the Blender website.
You have to have a copy of Blender.LectureEdit downloaded to your computer. There is a button to do that on the project’s GitHub page. It is recommended to use git for the download, so you can easily fetch the latest updates. However, if you are unfamiliar with git, you can also download and unpack the project’s files as a zip-file.
You need the Microsoft PowerPoint pptx-file, that contains the slides of the lecture, of which you want to produce the video. Unfortunately, Blender.LectureEdit does not support slide decks, that have been created with other software such as LibreOffice Impress, TeX or Apple Keynote.
You need recordings of a speaker, who gives the lecture. This must be at least a video of the speaker. It is recommended to have another video, which captures the slide changes during the speaker’s talk. And you can provide a separate audio track, if the audio in the video of the speaker is not satisfactory. All of these files can be split into multiple files.
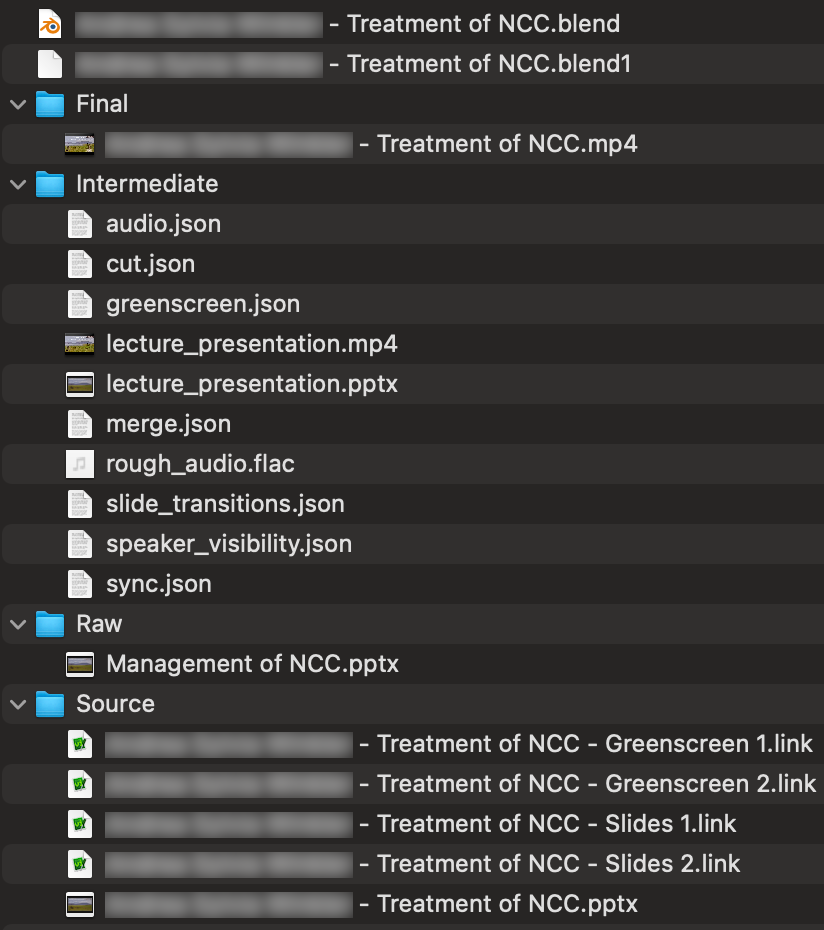
Setting up the file structure
It is recommended to have a separate directory for each lecture, that you produce with Blender.LectureEdit. This directory will contain the Blender project files and the following sub-directories:
Sourcecontains the source files, from which the lecture video is created. These are the recordings of the speaker and the pptx-file with the slides.Intermediatewill contain the intermediate files, that will be created by Blender.LectureEdit. While some of these files have to be edited manually, all of them are created automatically.Finalwill contain the final results of the processing. Usually, this is the rendered video, but it can also be a pdf-export of the slides or a thumbnail image for uploading the video to an internet platform like Youtube.Rawis an optional directory for files, that are related to the project, but are not processed during the video editing. These files could be a backup of the original slide deck from the speaker, while the one in theSourcedirectory is edited to make room for the speaker in the video.
The name of the Blender project file determines the file names of the files in the Source and the Final directory, while the files in the Intermediate directory are automatically created and have generic names.
For example, the file with the presentation slides must have the same file name as the Blender project file (except for the .pptx file extension).
The video recordings of the speaker and the slides have to have a suffix in their file name, that indicates, which file is which:
- Slidesfor the video of the lecture slides- Speakerfor a video of the speaker, if the speaker is not recorded in front of a green screen- Greenscreenfor a video of the speaker, who is recorded in front of a green screen- Audiofor a separate audio file
If one or more of the videos are split to multiple files, the file names can contain numbers after the suffix to indicate their order.
Here is a screenshot of an example setup.
Note how the name of the Blender project files resembles the names of the files in the Source and Final directory and how the original videos are split to multiple files (their file extension .link is explained here).
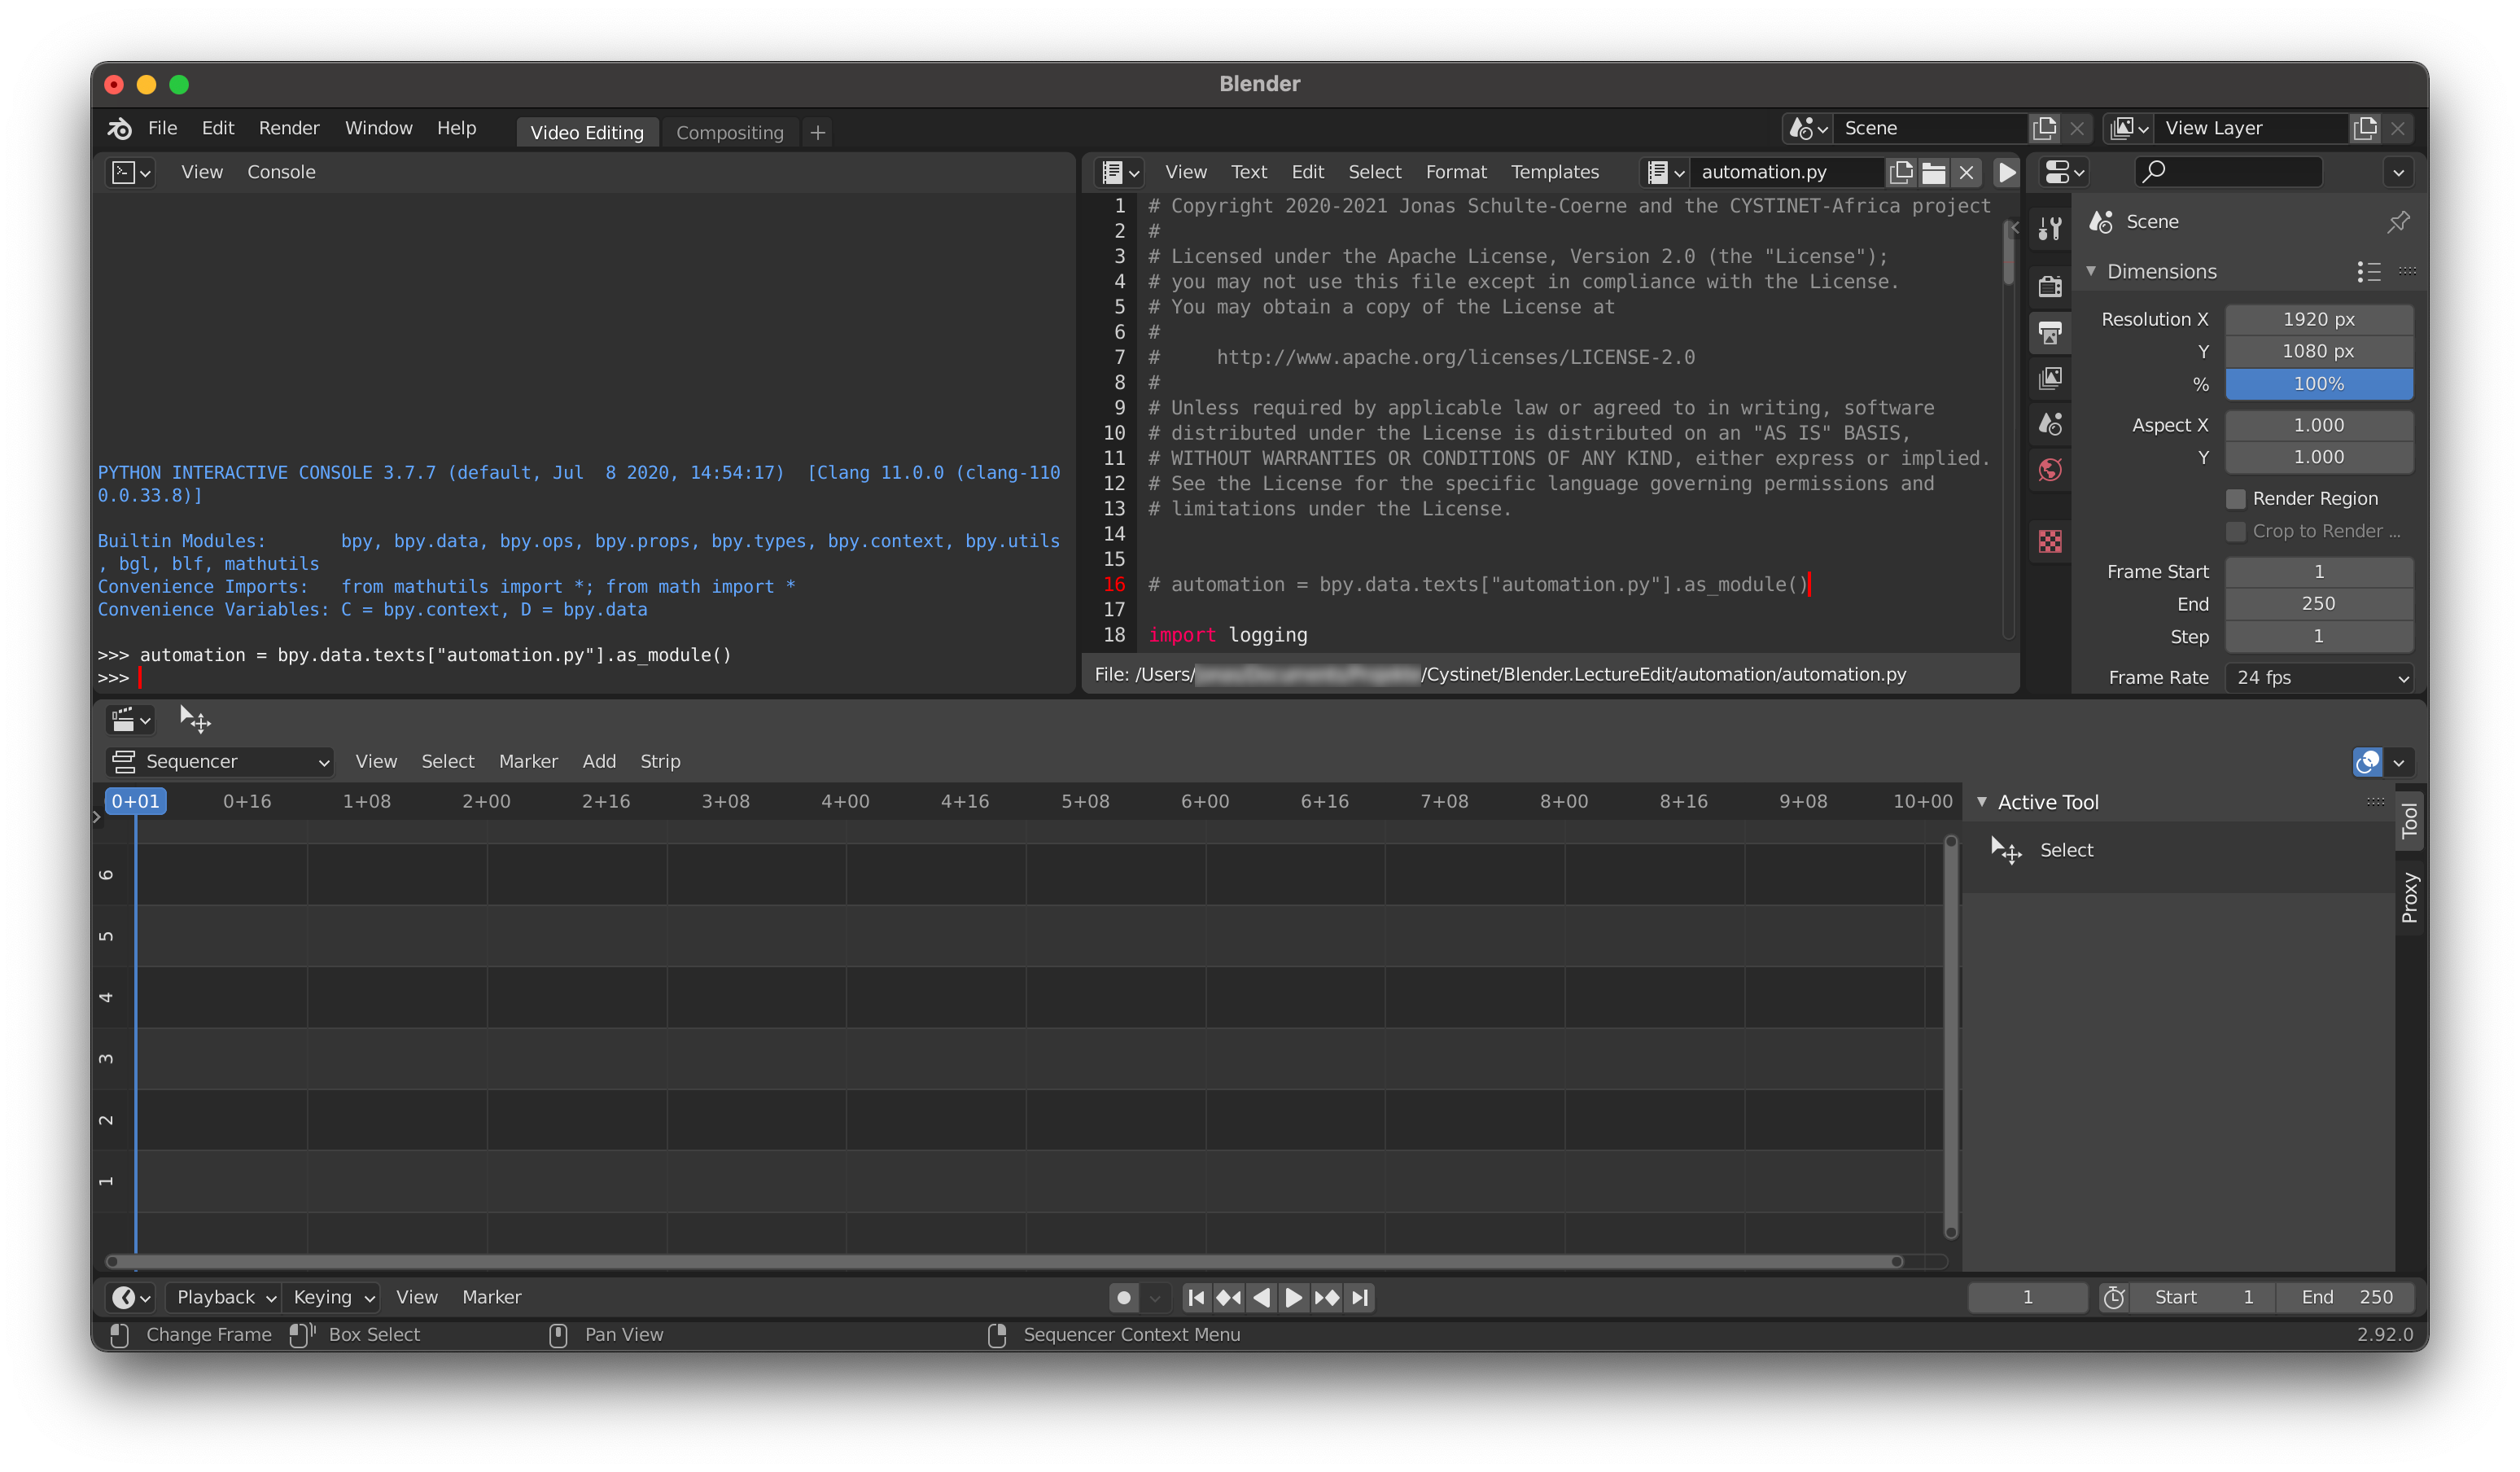
Setting up the Blender project
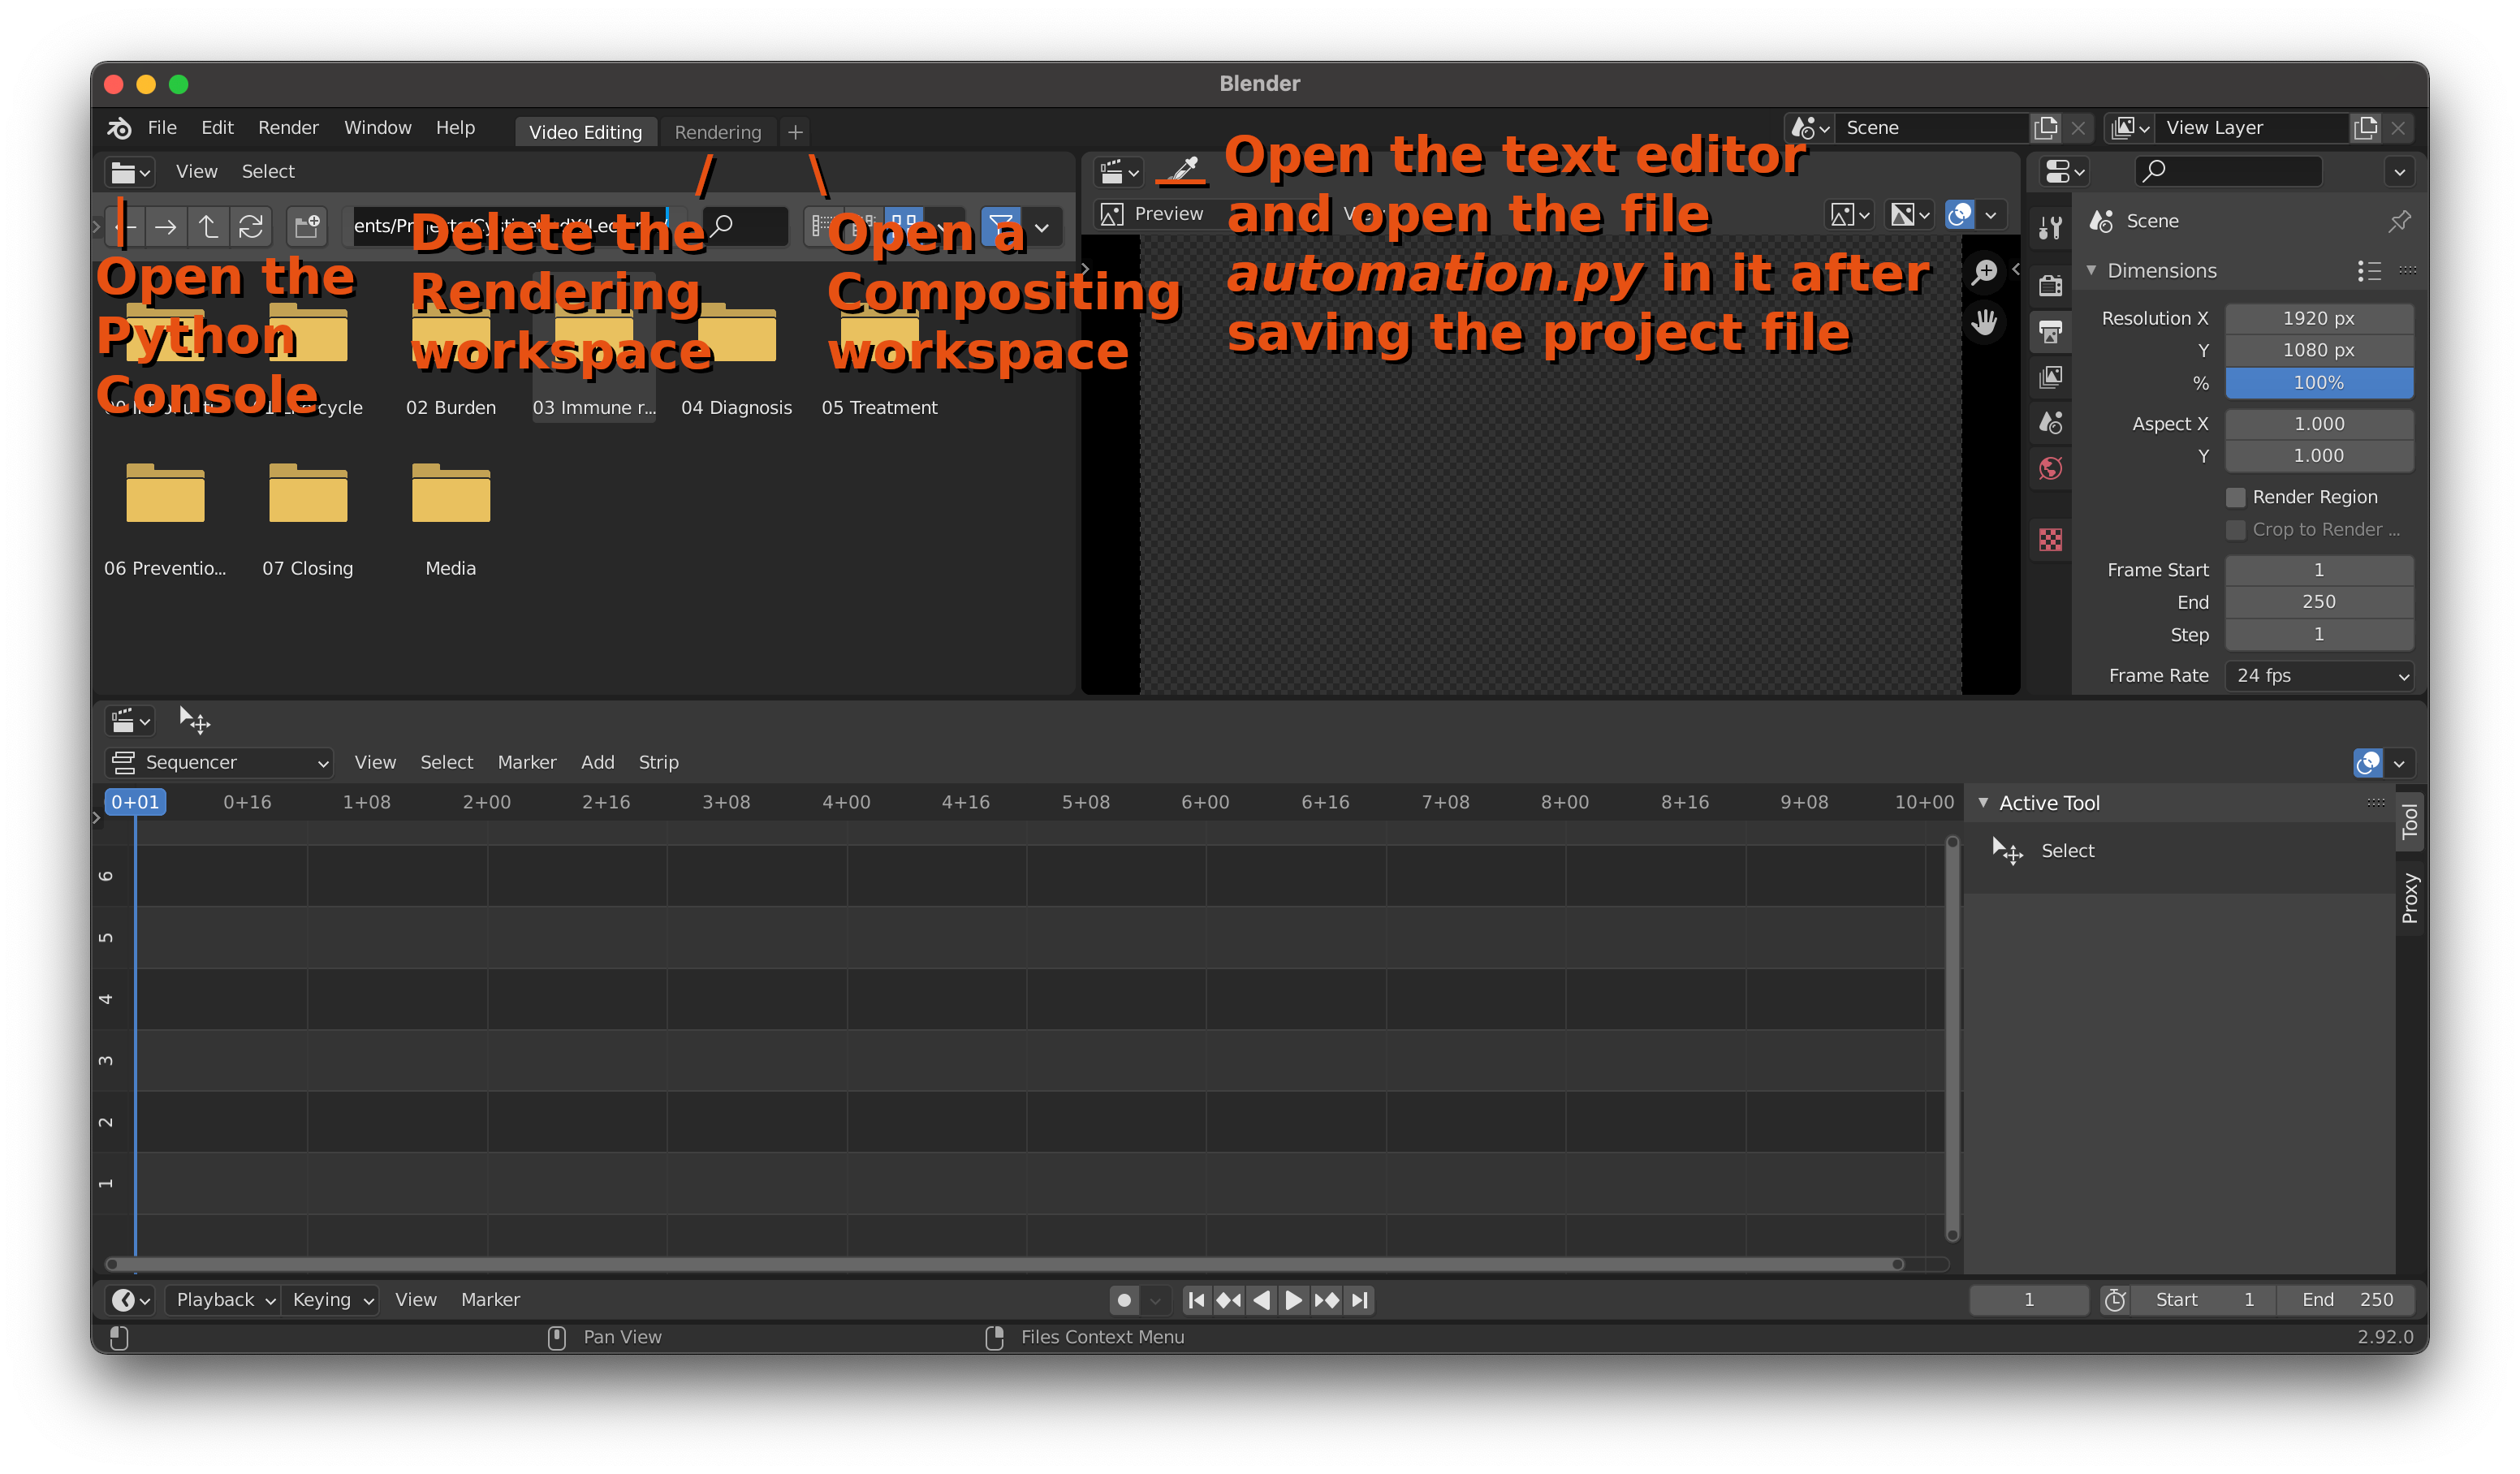
When opening Blender, it offers a bunch of profiles for creating the new file. The profile, that works best with Blender.LectureEdit is Video Editing. However, some changes need to be made:
You can delete the Rendering workspace in the top menu bar.
If you have a green screen video of the speaker, you should open a Compositing workspace.
You should open the Python Console instead of the File Browser.
And you should switch from the video preview to the Text Editor. Here, you can later switch back to the preview.
The following screenshot shows, where to make these changes:
After this, you should save your project. Bear in mind, that many other file names are influenced by the file name for your project, so choose it wisely.
After saving the project, you can open the file automation.py from the automation directory of Blender.LectureEdit in Blender’s text editor.
With this, you can execute the following command in the Python console, which makes the functionalities of Blender.LectureEdit available:
>>> automation = bpy.data.texts["automation.py"].as_module()
This command has to be executed again after every fresh start of Blender. Executing it repeatedly, does not do any damage, so you can re-execute it to be on the safe side, even though Blender has not been restarted.
Now, your Blender setup should look somewhat like this: